RealGrid2 Basic with VueJS
Architectures
- 개발도구: Visual Studio Code 1.74.3
- Node Version 14.21.2
Introduction
본 가이드는 VueJS프레임워크를 사용하여 Node환경에서 RealGrid에 데이터를 뿌려주는 간단한 화면을 만드는 방법에 대해 설명하고 있습니다.
주의사항
RealGridVue 컴포넌트를 사용하지 않고 컴포넌트를 직접 만드시는경우 gridView 객체와 provider를 ref()로 참조하시면 성능에 심각한 문제가 있을 수 있습니다.
ref()로 참조하지마세요.
Create a Project
Visual Studio Code 터미널에서 아래와 같이 작성하여 Vue프로젝트를 생성합니다.
$ npm install -g @vue/cli
$ vue create realgrid_sample
본 예제에서는 realgrid_sample로 생성하겠습니다.

Setup the RealGrid
RealGrid를 설치하는 작업은 어떤 개발환경이나 실행환경에서도 간단히 처리할 수 있습니다. 정식으로 제품을 구매한 경우와 평가판으로 제품을 받은 경우 모두 동일한 방법으로 설치를진행 할 수 있습니다. 본 가이드에서는 npm을 사용하여 설치하도록 하겠습니다.
$ npm install realgrid
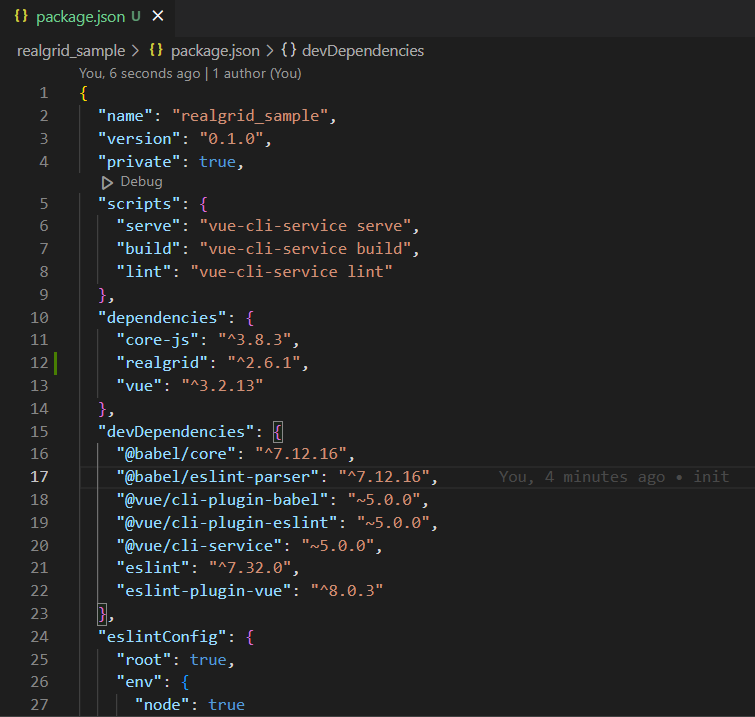
설치가 완료되면 package.json파일에서 realgrid 버전을 확인하실 수 있습니다.

License
public 폴더의 index.html파일에 라이선스 키를 입력합니다.
<!DOCTYPE html>
<html lang="">
  <head>
    <meta charset="utf-8">
    <meta http-equiv="X-UA-Compatible" content="IE=edge">
    <meta name="viewport" content="width=device-width,initial-scale=1.0">
    <link rel="icon" href="<%= BASE_URL %>favicon.ico">
    <title><%= htmlWebpackPlugin.options.title %></title>
    <script>
      /** 아래 라이선스키는 localhost, 127.0.0.1에서만 사용이 가능한 라이선스 입니다. */
      var realGrid2Lic = "upVcPE+wPOmtLjqyBIh9RkM/nBOseBrflwxYpzGZyYm9cY8amGDkiMnVeQKUHJDjW2y71jtk+wteqHQ1mRMIXzEcGIrzZpzzNTakk0yR9UcKS69Wn2kI83Uszabo3mU0LUipz0P8BheMHilNXwOhKViPkoEUbYPLyVfdcZjXXt8=";
    </script>
  </head>
  <body>
    <noscript>
      <strong>We're sorry but <%= htmlWebpackPlugin.options.title %> doesn't work properly without JavaScript enabled. Please enable it to continue.</strong>
    </noscript>
    <div id="app"></div>
    <!-- built files will be auto injected -->
  </body>
</html>
Initialization
GridView와 DataProvider를 매핑하기 위한 변수를 선언합니다. setDataSource를 호출하여 GridView에 DataProvider를 연결합니다.
Add Fields and columns
RealGrid는 구조적으로 데이터 영역과 뷰 영역이 분리 되어 있습니다. Column은 데이터 영역에서 Field를 표현하는 ViewModel이므로 그리드 위에 Field를 표현하기 위해서는 Column에 대한 정의가 필요합니다.
DataProvider의 setFields()로 Field를 정의합니다.
realgrid-data.js파일을 만들어 Fields와 Columns를 생성합니다.
import { ValueType } from "realgrid";

export const fields = [
  {
    fieldName: "Name",
    dataType: ValueType.TEXT,
  },
  {
    fieldName: "FullName",
    dataType: ValueType.TEXT,
  },
  {
    fieldName: "Age",
    dataType: ValueType.NUMBER,
  },
  {
    fieldName: "Company",
    dataType: ValueType.TEXT,
  },
  {
    fieldName: "Email",
    dataType: ValueType.TEXT,
  },
];

export const columns = [
  {
    name: "Name",
    fieldName: "Name",
    width: "80",
    header: {
      text: "Name",
    },
  },
  {
    name: "FullName",
    fieldName: "FullName",
    width: "150",
    header: {
      text: "Full Name",
    },
  },
  {
    name: "Company",
    fieldName: "Company",
    width: "220",
    header: {
      text: "Company Name",
    },
  },
  {
    name: "Age",
    fieldName: "Age",
    width: "130",
    header: {
      text: "Age",
    },
  },
  {
    name: "Email",
    fieldName: "Email",
    width: "300",
    header: {
      text: "Email",
    },
  },
];

export const rows = [
  {
    Name: "Kessie",
    FullName: "Vijendra N. Raj",
    Email: "mus.Donec.dignissim@Praesent.edu",
    Company: "Arcu Et Pede Incorporated",
    Age: "17",
  },
  {
    Name: "Evelyn",
    FullName: "Hridaynath K. Ismail",
    Email: "fringilla.euismod@elementum.edu",
    Company: "Aliquam Tincidunt Ltd",
    Age: "28",
  },
];
RealGrid.vue 파일을 생성합니다.
<template>
  <div id="realgrid" style="width: 100%; height: 400px"></div>
</template>

<script>

import { GridView, LocalDataProvider } from 'realgrid';
import { columns, fields, rows } from './realgrid-data';
export default {
  name: 'RealGrid',
  setup() {
    return {};
  },
  methods: {

  },
  mounted() {
    this.dataProvider = new LocalDataProvider(false);
    this.gridView = new GridView('realgrid');
    this.gridView.setDataSource(this.dataProvider);
    this.dataProvider.setFields(fields);
    this.gridView.setColumns(columns);
    this.dataProvider.setRows(rows);
  },
};

</script>
RealGrid 컴포넌트까지 작성이 완료되었습니다.
App.vue 파일에 작성한 컴포넌트를 추가합니다.
<template>
  <h2>RealGrid Vue3 Sample</h2>
  <RealGrid />
</template>

<script>
import RealGrid from './components/RealGrid.vue';

export default {
  name: 'App',
  components: {
    RealGrid
  }
}

require('../node_modules/realgrid/dist/realgrid-style.css');
</script>

<style>
#app {
  font-family: Avenir, Helvetica, Arial, sans-serif;
  -webkit-font-smoothing: antialiased;
  -moz-osx-font-smoothing: grayscale;
  text-align: center;
  color: #2c3e50;
  margin-top: 60px;
}
</style>
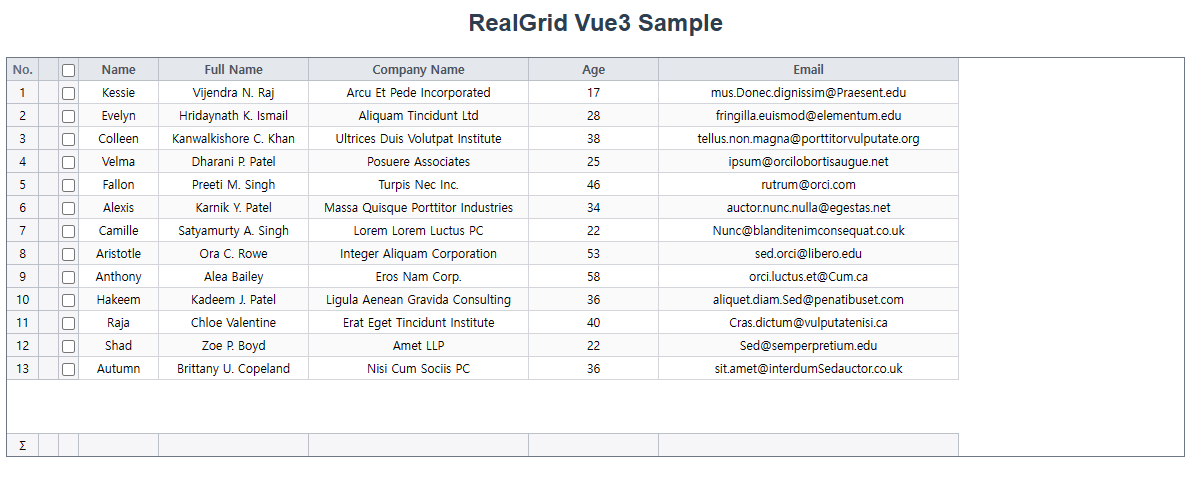
이제 웹 페이지를 실행해보면 그리드가 생성된 모습을 확인할 수 있습니다.

소스코드 다운로드