RealGrid2 Basic with JAVA Spring & MyBatis & MARIADB
Architectures
- Development tool: Spring Tool Suite 3.9.11
- WAS: tomcat 8.5
- Database: MariaDB 10.6.8
Introduction
This guide explains how to create a simple screen that displays data to RealGrid in a Java Spring MVC and MariaDB environment. To read and understand this tutorial, you need basic knowledge of Java. In this example, only Spring MVC was used with Spring Tool Suite 3.9.11. This guide implements functions to view, add, edit, and delete data contained in a specific table in MariaDB on a web screen that includes RealGrid2.
A New Web Suite
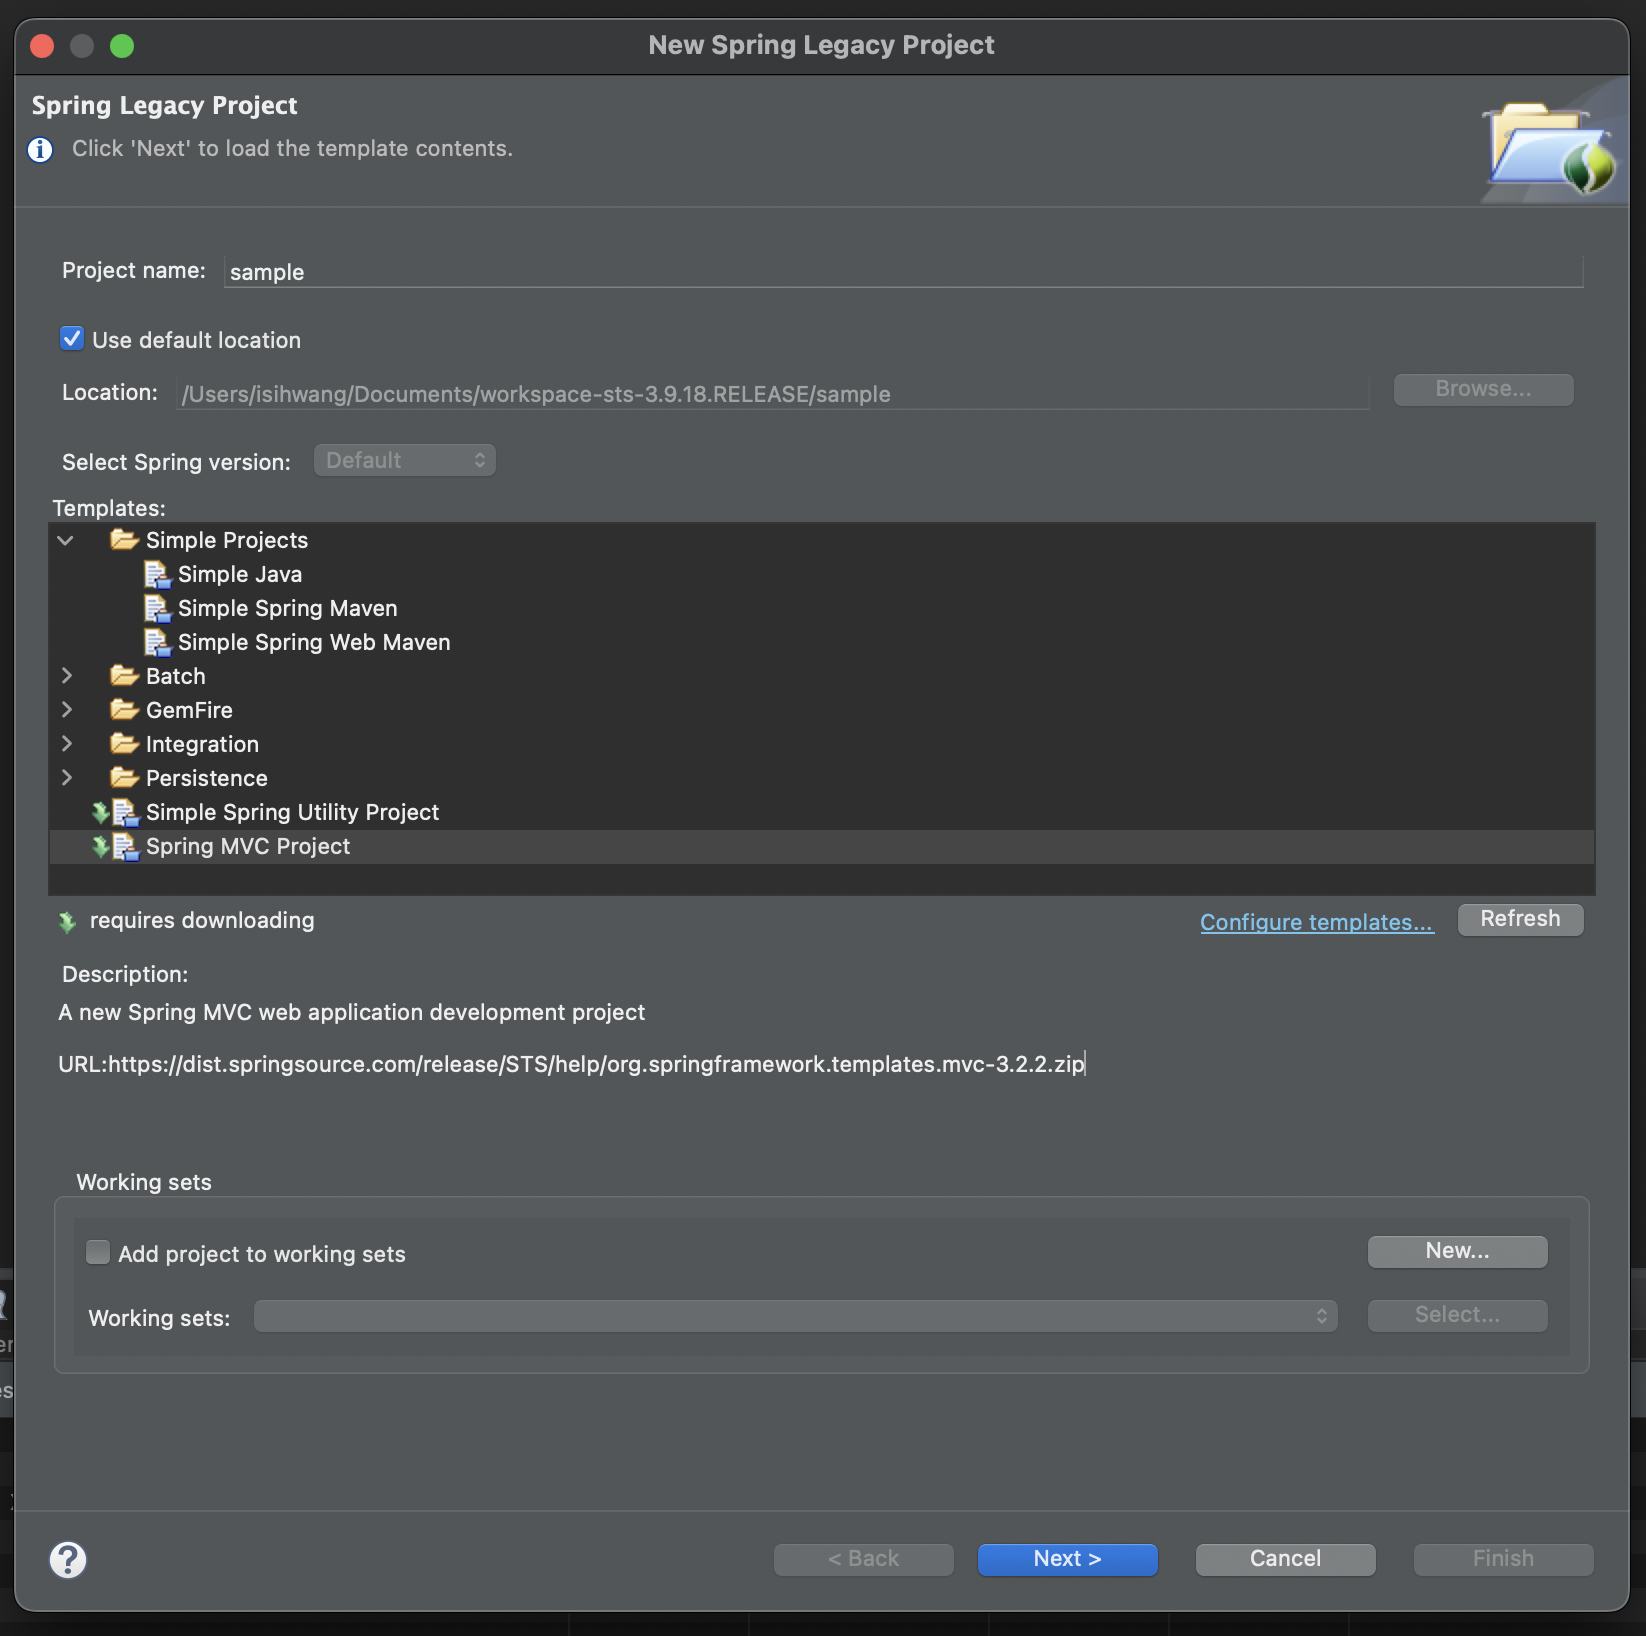
Run Spring Tool Suite 3.9.11. From the File menu, run New -> Spring Legacy Project -> Spring MVC Project. Set the Project name and Top Level Package and create a new project. In this example, the Project name will be realGrid and the Top Level Package will be com.java.realgrid.
Create a Web Page
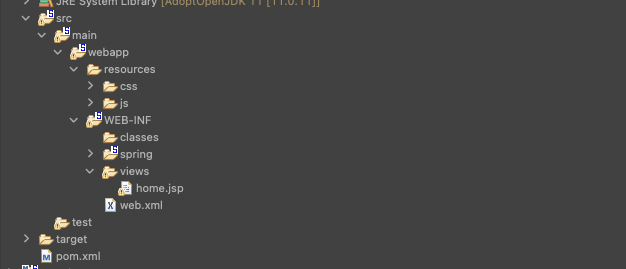
Create a new web page to house RealGrid on. Name the new web page home.jsp.
Setup the RealGrid
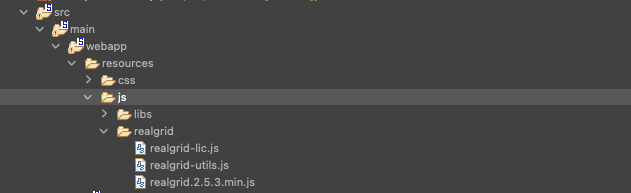
Installing RealGrid can be easily done in any development or execution environment. You can proceed with installation in the same way whether you purchased the product officially or received it as a trial version. Move the js and css files included in the supplied product to the resources subfolder.
Initialization
Declare variables to map GridView and DataProvider. Attach a DataProvider to the GridView by calling setDataSource.
Add Fields and columns
RealGrid structurally separates the data area and view area. Column is a ViewModel that expresses a field in the data area, so defining a column is necessary to express the field on the grid.
Define a field with setFields() of DataProvider.
var fields = [
   {
     fieldName: "code",
   },
   {
     fieldName: "product_name",
   },
   {
     fieldName: "volume",
   },
   {
     fieldName: "unit",
   },
   {
     fieldName: "price",
     dataType: "number",
   },
];

var columns = [
   {
     fieldName: "code",
     width: 180,
     header: {
       text: "code",
     },
   },
   {
     fieldName: "product_name",
     width: 180,
     header: {
       text: "Product name",
     },
   },
   {
     fieldName: "volume",
     width: 180,
     header: {
       text: "Capacity",
     },
   },
   {
     fieldName: "unit",
     width: 180,
     header: {
       text: "Unit",
     },
   },
   {
     fieldName: "price",
     width: 180,
     header: {
       text: "unit price",
     },
   },
];
var dataProvider, gridContainer, gridView;
function createGrid(container) {
$("#realgrid").css("width", "50%");
$("#realgrid").css("height", "550px");
dataProvider = new RealGrid.LocalDataProvider();
gridView = new RealGrid.GridView(container);
gridView.setDataSource(dataProvider);
dataProvider.setFields(fields);
gridView.setColumns(columns);
}
function start() {
createGrid("realgrid");
}
window.onload = start;Now, if you run the web page, you can see that a column has been added to the grid.

Connecting a Database
Now let's turn our attention to server operations for a moment. Connecting to MariaDB and retrieving data from Java Spring is not difficult.
First, let's briefly modify the home.jsp page to check whether the DB connection is established and whether the correct data is being retrieved from the DB. We also modify HomeController for DB connection testing.
<html lang="=ko">
   <head>
     <meta charset="UTF-8" />
     <meta http-equiv="X-UA-Compatible" content="IE=edge" />
     <meta
       name="viewport"
       content="width=device-width, initial-scale=1,maximum-scale=1"
     />
     <title>DB TEST</title>
   </head>
   <body>
     <div class="title">
       <span>DB TEST</span>
     </div>
     <span>${data.get(0).getProduct_name()}</span>
   </body>
</html>
@RequestMapping(value = "/", method = RequestMethod.GET)
public String dbtest(Locale locale, Model model) {

List<RealGridDemoVO> data = realGridDemoService.getDatas();
System.out.println(data.get(0).getProduct_name());
model.addAttribute("data", data);

return "home";
}
Add UTF-8 encodingFilter to web.xml in WEB-INF.
<!-- Start of spring encoding filter registration -->
<filter>
<filter-name>encodingFilter</filter-name>
<filter-class>org.springframework.web.filter.CharacterEncodingFilter
</filter-class>
<init-param>
<param-name>encoding</param-name>
<param-value>UTF-8</param-value>
</init-param>
<init-param>
<param-name>forceEncoding</param-name>
<param-value>true</param-value>
</init-param>
</filter>
<filter-mapping>
<filter-name>encodingFilter</filter-name>
<url-pattern>/*</url-pattern>
</filter-mapping>
Add mariadb and mybatis related dependencies to pom.xml.
<!-- dependencies for RealGrid Demo -->
<!-- 3. DB connection -->
<dependency>
<groupId>org.springframework</groupId>
<artifactId>spring-jdbc</artifactId>
<version>${org.springframework-version}</version>
</dependency>
<dependency>
<groupId>org.springframework</groupId>
<artifactId>spring-orm</artifactId>
<version>${org.springframework-version}</version>
</dependency>
<dependency>
<groupId>org.springframework</groupId>
<artifactId>spring-tx</artifactId>
<version>${org.springframework-version}</version>
</dependency>
<!-- 9. mybatis -->
<dependency>
<groupId>org.mybatis</groupId>
<artifactId>mybatis</artifactId>
<version>3.3.0</version>
</dependency>
<dependency>
<groupId>org.mybatis</groupId>
<artifactId>mybatis-spring</artifactId>
<version>1.2.3</version>
</dependency><!-- 6. DBCP settings -->
<dependency>
<groupId>org.apache.commons</groupId>
<artifactId>commons-dbcp2</artifactId>
<version>2.1</version>
</dependency>
<dependency>
<groupId>org.apache.commons</groupId>
<artifactId>commons-pool2</artifactId>
<version>2.4.1</version>
</dependency>
<!-- MariaDB -->
<dependency>
<groupId>org.mariadb.jdbc</groupId>
<artifactId>mariadb-java-client</artifactId>
<version>2.3.0</version>
</dependency>
<!-- dependency for JSON processing -->
<dependency>
<groupId>net.sf.json-lib</groupId>
<artifactId>json-lib</artifactId>
<version>2.4</version>
<classifier>jdk15</classifier>
</dependency>
<dependency>
<groupId>org.codehaus.jackson</groupId>
<artifactId>jackson-mapper-asl</artifactId>
<version>1.9.13</version>
</dependency>
<dependency>
<groupId>com.fasterxml.jackson.core</groupId>
<artifactId>jackson-core</artifactId>
<version>2.13.3</version>
</dependency>
Constructs an MVC-style class for DB connection. Create service, dao, and vo respectively in the src/main/java folder.

@Service
RealGridDemoService.java
Create a RealGridDemoService to be used in the service layer.
@Service
public class RealGridDemoService {
@Autowired
RealGridDemoDAO realGridDemoDAO;

public List<RealGridDemoVO> getDatas() {
return realGridDemoDAO.getDatas();
}
}
RealGridDemoDAO.java
Create an interface RealGridDemoDAO to use in the persistence layer.
public interface RealGridDemoDAO {
public List<RealGridDemoVO> getDatas();
}
RealGridDemoVO.java
Create RealGridDemoVO to receive and pass on DB information.
public class RealGridDemoVO {
private String code;
private String product_name;
private String volume;
private String unit;
private int price;

public String getCode() {
return code;
}
public void setCode(String code) {
this.code = code;
}
public String getProduct_name() {
return product_name;
}
public void setProduct_name(String product_name) {
this.product_name = product_name;
}
public String getVolume() {
return volume;
}
public void setVolume(String volume) {
this.volume = volume;
}
public String getUnit() {
return unit;
}
public void setUnit(String unit) {
this.unit = unit;
}
public int getPrice() {
return price;
}
public void setPrice(int price) {
this.price = price;
}
}
Set mybatis and db.properties in the already created root-context.xml.
<!-- Register to use property file -->
<context:property-placeholder
location="classpath:db.properties" />
<!-- dataSource settings -->
<bean id="dataSource"
class="org.springframework.jdbc.datasource.DriverManagerDataSource">
<property name="driverClassName" value="${m.driver}" />
<property name="url" value="${m.url}" />
<property name="username" value="${m.username}" />
<property name="password" value="${m.password}" />
</bean>
<!-- add mybatis -->
<bean id="sqlSessionFactory"
class="org.mybatis.spring.SqlSessionFactoryBean">
<property name="dataSource" ref="dataSource" />
<!-- The part below sets the package path where the xml file to be mapped is located. -->
<property name="typeAliasesPackage"
value="com.java.realgrid.vo" />
<!-- Path where vo.java will be located -->
<property name="mapperLocations"
value="classpath*:/mapper/*.xml" />
</bean>
<!-- scan for mappers and let them be autowired -->
<bean class="org.mybatis.spring.mapper.MapperScannerConfigurer">
<property name="basePackage" value="com.java.realgrid.dao" />
<!-- Path where dao.java is located -->
<property name="sqlSessionFactoryBeanName"
value="sqlSessionFactory" />
</bean>
<!-- Add transaction manager -->
<bean id="transactionManager"
class="org.springframework.jdbc.datasource.DataSourceTransactionManager">
<property name="dataSource" ref="dataSource" />
</bean>
Add controller and service to servlet-context.xml.
<beans:bean id="RealGridDemoService"
class="com.java.realgrid.service.RealGridDemoService" />
<!-- Path where service is located -->
<context:component-scan
base-package="com.java.realgrid.controller" />
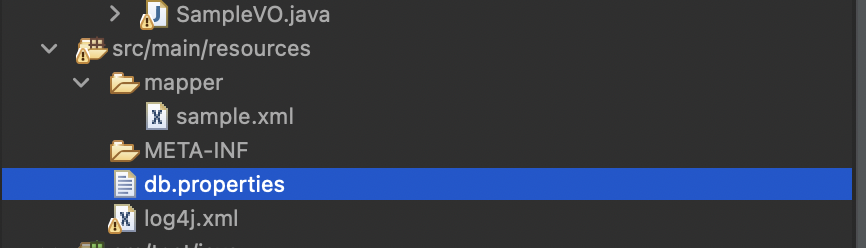
Place the db.properties file for mariaDB settings under the src/main/resources folder.
m.driver=org.mariadb.jdbc.Driver
m.url=jdbc:mariadb://localhost:3306/test?allowMultiQueries=true
m.username=root
m.password=1234
Additionally, create a mapper folder and a sample.xml file to write queries.
<?xml version="1.0" encoding="UTF-8"?>
<!DOCTYPE mapper PUBLIC "-//mybatis.org//DTD Mapper 3.0//EN"
"http://mybatis.org/dtd/mybatis-3-mapper.dtd">
<mapper namespace="com.java.realgrid.dao.RealGridDemoDAO">
<!-- Write the path to the DAO created in the namespace and the name of the file. -->
<select id="getDatas" resultType="com.java.realgrid.vo.RealGridDemoVO">
SELECT * FROM sample;
</select>
</mapper>
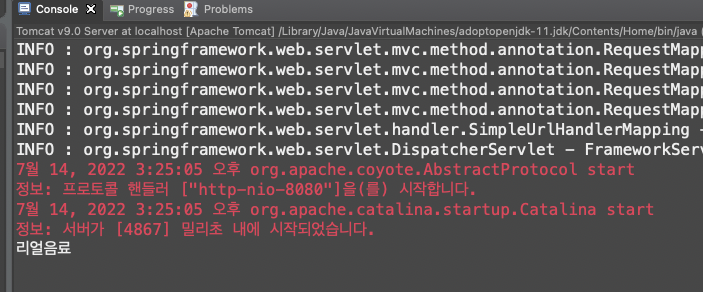
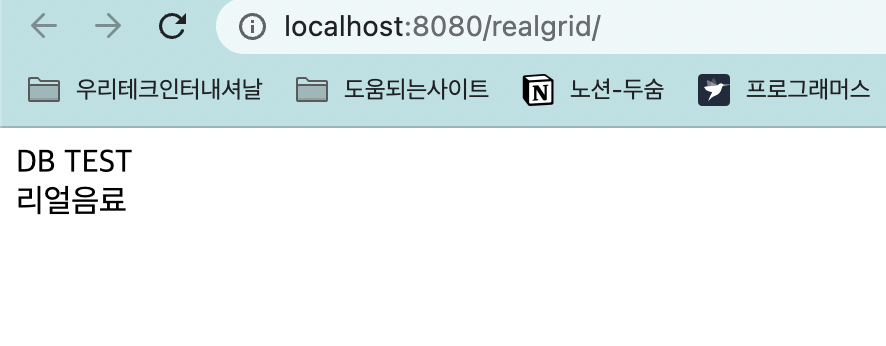
If you enter http://localhost:8080/realgrid/ (opens in a new tab) in a Windows browser, you can check that the DB data has been imported in the console window and Windows browser.
Now that confirmation is complete, create the grid area in home.jsp again.
<html lang="=ko">
   <head>
     <meta charset="UTF-8" />
     <meta http-equiv="X-UA-Compatible" content="IE=edge" />
     <meta
       name="viewport"
       content="width=device-width, initial-scale=1,maximum-scale=1"
     />
     <title>Home</title>
     <script
       src="https://code.jquery.com/jquery-3.6.0.min.js"
       integrity="sha256-/xUj+3OJU5yExlq6GSYGSHk7tPXikynS7ogEvDej/m4="
       crossorigin="anonymous"
     ></script>
     <script src=" ${pageContext.request.contextPath }/resources/js/realgrid/realgrid-lic.js"></script>
     <script src=" ${pageContext.request.contextPath }/resources/js/realgrid/realgrid.2.x.x.min.js"></script>
     <script src=" ${pageContext.request.contextPath }/resources/js/realgrid/libs/jszip.min.js"></script>
     <link
       rel="stylesheet"
       href="${pageContext.request.contextPath }/resources/css/realgrid-style.css"
     />
   </head>
   <body>
     <script>
       // Script to insert grid-related code
     </script>
     <div class="title">
       <span>RealGrid on Java Spring MVC and MaridDB</span>
     </div>

     <div id="realgrid"></div>
   </body>
</html>
Load Data
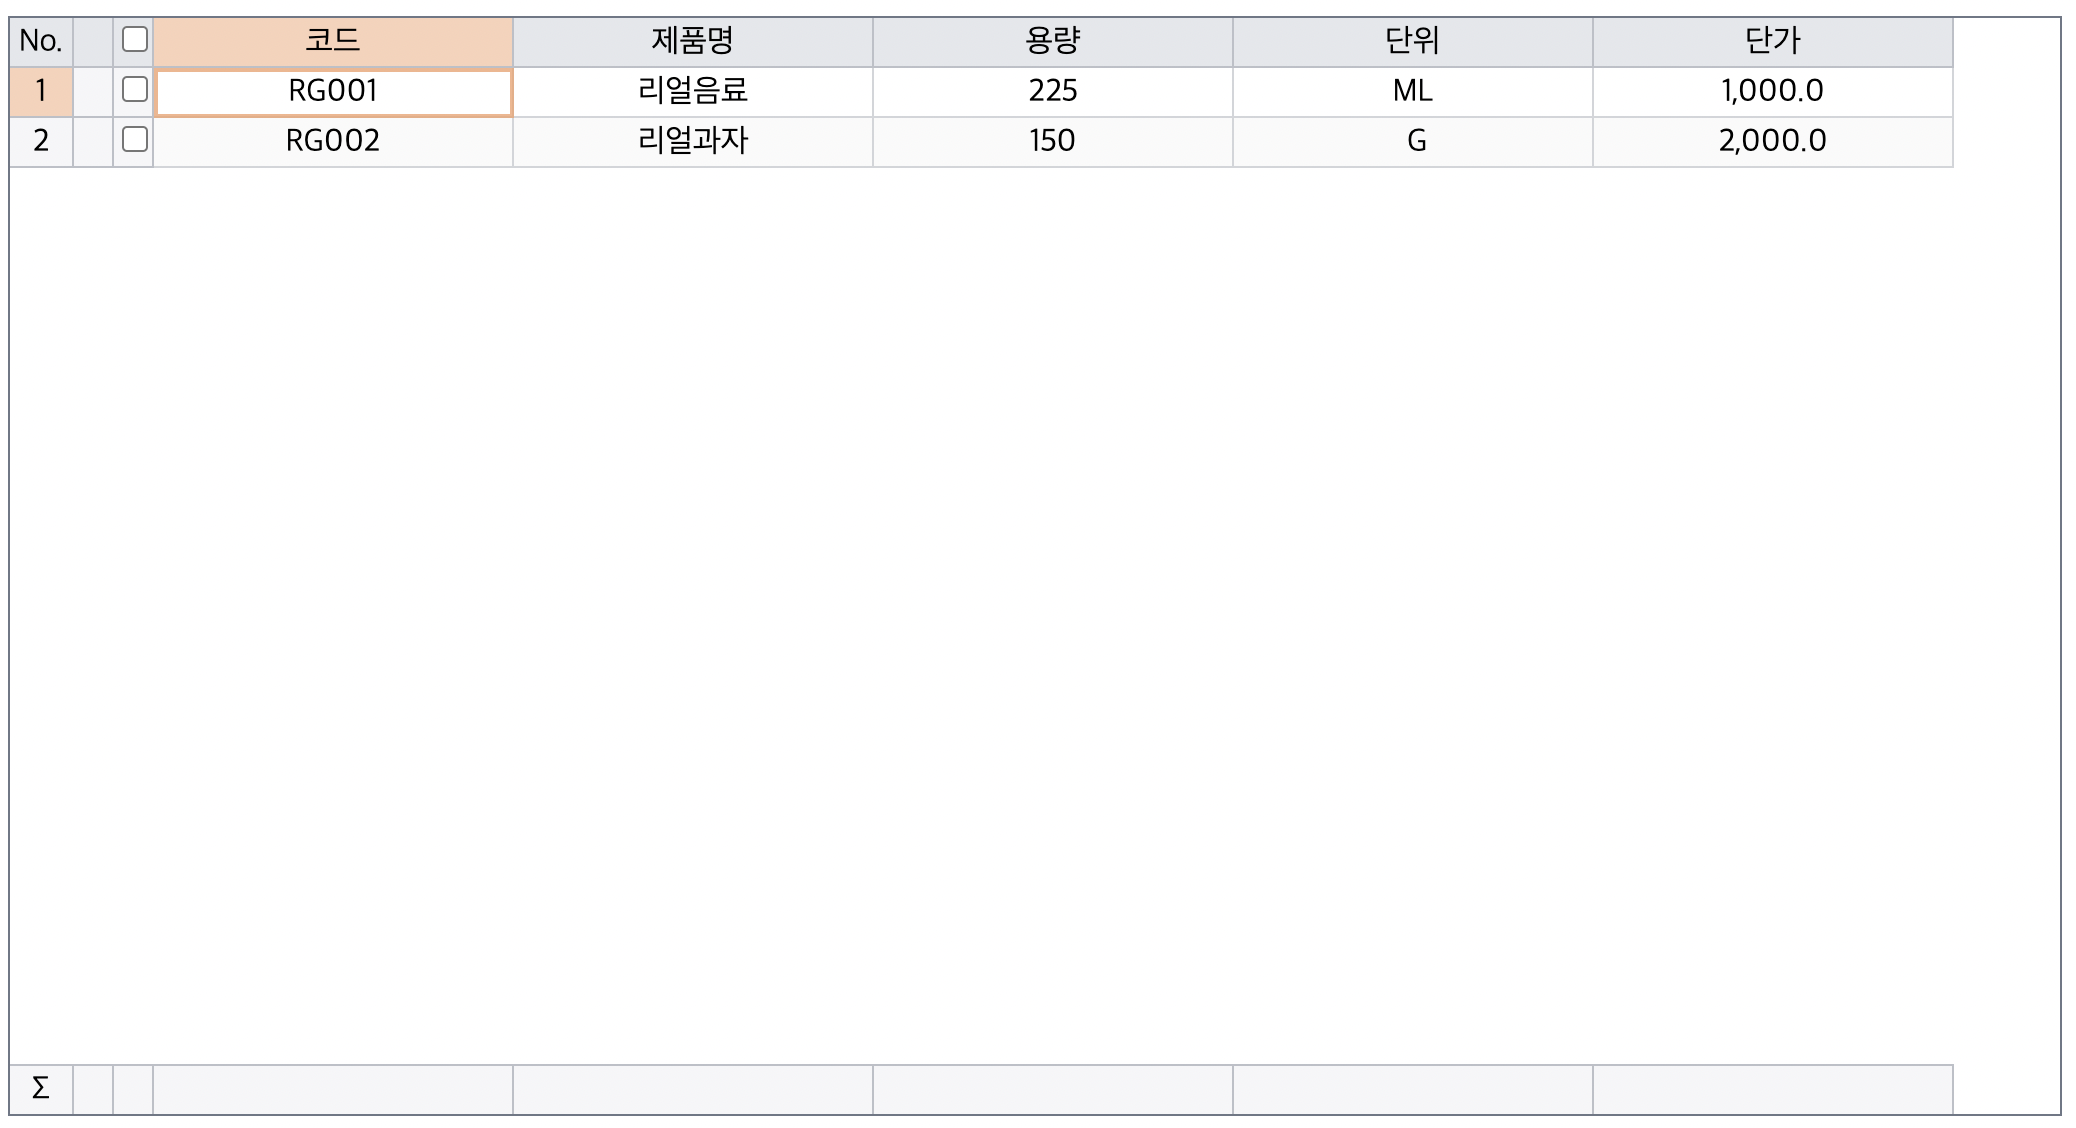
There are several ways to set up data in RealGrid. This tutorial explains how to get data asynchronously using DataProvider's FillJsonData(). Enter the code below to call the server page created in the previous chapter to fetch data and then pass it to the DataProvider.
function loadData(provider) {
   $.ajax({
     type: "post",
     dataType: "json",
     url: "getDatas",
     success: function (data) {
       dataProvider.fillJsonData(data);
     },
     error: function (xhr, status, error) {
       alert(error);
     },
   });
}
Create Controller, Service, and DAO.
###HomeController
@RequestMapping(value = "getDatas", method = RequestMethod.POST)
public @ResponseBody List<RealGridDemoVO> productlList() {
List<RealGridDemoVO> data = realGridDemoService.getDatas();
return data;
}
Service
@Service
public class RealGridDemoService {
@Autowired
RealGridDemoDAO realGridDemoDAO;

public List<RealGridDemoVO> getDatas() {
return realGridDemoDAO.getDatas();
}
}
###DAOs
@Repository
public interface RealGridDemoDAO {
public List<RealGridDemoVO> getDatas();
}
Let's call the loadData() function in createGrid once again to load data into RealGrid.
var fields = [
   {
     fieldName: "code",
   },
   {
     fieldName: "product_name",
   },
   {
     fieldName: "volume",
   },
   {
     fieldName: "unit",
   },
   {
     fieldName: "price",
     dataType: "number",
   },
];

var columns = [
   {
     fieldName: "code",
     width: 180,
     header: {
       text: "code",
     },
   },
   {
     fieldName: "product_name",
     width: 180,
     header: {
       text: "Product name",
     },
   },
   {
     fieldName: "volume",
     width: 180,
     header: {
       text: "Capacity",
     },
   },
   {
     fieldName: "unit",
     width: 180,
     header: {
       text: "Unit",
     },
   },
   {
     fieldName: "price",
     width: 180,
     header: {
       text: "unit price",
     },
   },
];

var dataProvider, gridContainer, gridView;
function createGrid(container) {
   $("realgrid").css("width", "50%");
   $("#realgrid").css("height", "550px");
   $("#realgrid").css("margin", "0 auto");

   dataProvider = new RealGrid.LocalDataProvider();
   gridView = new RealGrid.GridView(container);
   gridView.setDataSource(dataProvider);

   dataProvider.setFields(fields);
   gridView.setColumns(columns);

   loadData(dataProvider);
}
Insert Data
If the grid's editOptions.insertable is true, the user can start inserting rows with the Insert key, and if editOptions.appendable is true, the user can start adding rows with the down arrow key from the last row. Pressing the Esc key while editing a cell cancels editing the cell, and pressing the Esc key while not editing a cell cancels adding a row. Additionally, users can insert/add rows through javascript methods, as shown in the example below.
For a more detailed explanation of editOptions, please refer to the following link:
https://docs.realgrid.com/refs/Interface/EditOptions#editoptions (opens in a new tab)
function createGrid(container) {
   $("#realgrid").css("width", "50%");
   $("#realgrid").css("height", "550px");

   dataProvider = new RealGrid.LocalDataProvider();
   gridView = new RealGrid.GridView(container);
   gridView.setDataSource(dataProvider);

   dataProvider.setFields(fields);
   gridView.setColumns(columns);

   setOptions(gridView);

   loadData(dataProvider);
}

function setOptions(grid) {
   grid.setOptions({
     edit: {
       insertable: true;
       appendable: true,
     },
   });
}
In this example, we will process it by directly saving the row. First, let's add an insert method to the controller to process the insert task on the server.
The contents of the insert method are as follows:
@RequestMapping(value = "addData")
public @ResponseBody int addData(@ModelAttribute RealGridDemoVO data) {
int num = realGridDemoService.addData(data);
return number;
}
In home.jsp, add three Insert/Add/Save buttons as follows.
<div class="save_btn_container">
   <button onClick="btnSaveData()">Save current row</button>
</div>
<div id="realgrid"></div>
<div class="toolbar">
   <button onClick="btnGridInsert()">beginInsertRow in grid</button>
   <button onClick="btnGridAppend()">beginAppendRow in grid</button>
</div>
Write a method for each button to perform.
function btnGridInsert() {
   var curr = gridView.getCurrent();
   gridView.beginInsertRow(Math.max(0, curr.itemIndex));
   gridView.showEditor();
   gridView.setFocus();
}

function btnGridAppend() {
   gridView.beginAppendRow();gridView.showEditor();
   gridView.setFocus();
}

function btnSaveData() {
   gridView.commit();

   var currRow = gridView.getCurrent().dataRow;
   if (currRow < 0) return;

   var currState = dataProvider.getRowState(currRow);
   if (currState == "created") {
     saveData("addData");
   }
}
function saveData(urlStr) {
   var jRowData = dataProvider.getJsonRow(gridView.getCurrent().dataRow);

   $.post(urlStr, jRowData, function (data) {
     if (data > 0) {
       alert("Save successful");
       dataProvider.clearRowStates(true);
     } else {
       alert("Save failed!");
     }
   });
}
Run the web page, insert, and click the Save button to check whether the insert is done properly. However, the Save button only works on the currently selected row.
RealGrid performs data input and output through dataProvider. Data edited in the grid exists only in the grid and is reflected in the dataProvider only when editing is complete.
Editing can be completed by changing a line or calling the RealGrids.commit() method.
After adding a row, enter the data to be inserted, and then change the Row (commit()) to see how the stateBar area has changed.
RowStates of RealGrid
RealGrid's RowState has five states and is divided into NONE, CREATED, UPDATED, DELETED, and CREATE_AND_DELETED.
Update Data
Update is the same as Insert. No separate button is required; you only need to check if this data has been modified when saving. RealGrid changes RowState to UPDATED when data is modified. Based on this, we will write home.jsp and Controller.
@RequestMapping(value = "updateData")
public @ResponseBody int updateData(@ModelAttribute RealGridDemoVO data) {
int num = realGridDemoService.updateData(data);
return number;
}
function btnSaveData() {
   gridView.commit();

   var currRow = gridView.getCurrent().dataRow;
   if (currRow < 0) return;

   var currState = dataProvider.getRowState(currRow);
   if (currState == "created") {
     saveData("addData");
   } else if (currState == "updated") {
     saveData("updateData");
   }
}
As in the code above, it is modified to check whether the current grid status is UPDATED and call updateData.
Likewise, add it to sample.xml, DAO, and Service in the mapper.
<update id="updateData"
parameterType="com.java.realgrid.vo.RealGridDemoVO">
UPDATE sample
SET
product_name = #{product_name},
volume = #{volume},
unit = #{unit},
price = #{price}
WHERE code = #{code}
</update>
RealGridDemoDAO.java
public interface RealGridDemoDAO {
public List<RealGridDemoVO> getDatas();
public int addData(RealGridDemoVO realGridDemoVO);
public int updateData(RealGridDemoVO realGridDemoVO);
}
RealGridDemoService.java
@Service
public class RealGridDemoService {
@Autowired
RealGridDemoDAO realGridDemoDAO;

public List<RealGridDemoVO> getDatas() {
return realGridDemoDAO.getDatas();
}

public int addData(RealGridDemoVO realGridDemoVO) {
return realGridDemoDAO.addData(realGridDemoVO);
}

public int updateData(RealGridDemoVO realGridDemoVO) {
return realGridDemoDAO.updateData(realGridDemoVO);
}
}
Delete Data
If grid editOptions.deletable is true, the user can press Ctrl+Del to delete the currently selected row. If you need to get user confirmation before actually deleting, you can set the editOptions.confirmWhenDelete property to true. You can also specify the confirmation message as editOptions.deleteRowsMessage.
In this example, the softDeleting option is used to change the RowState to DELETED or CREATE_AND_DELETED rather than immediately deleting when performing the delete function.
Of course, when using the delete function, deleting a row directly can also be done using dataProvider.onRowDeleting() or dataProvider.onRowDeleted(), which are callback functions provided in RealGrid.
Now let's do the actual work. Create a DataDelete method in the same way as you did for INSERT and UPDATE DATA.
@RequestMapping(value = "deleteData")
public @ResponseBody int deleteData(@RequestParam String code) {
int num = realGridDemoService.deleteData(code);
return number;
}
Return to home.jsp and modify setOptions as follows to use the delete function.
function setOptions(grid) {
   grid.setOptions({
     edit: {
       insertable: true;
       appendable: true,
       deletable: true,
       confirmWhenDelete: true,
       deleteRowsMessage: "Are you sure?",
     },
   });
   dataProvider.setOptions({
     softDeleting: true;
   });
}

// Also modify btnSaveData.
function btnSaveData() {
   gridView.commit();

   var currRow = gridView.getCurrent().dataRow;
   if (currRow < 0) return;

   var currState = dataProvider.getRowState(currRow);
   if (currState == "created") {
     saveData("addData");
   } else if (currState == "updated") {
     saveData("updateData");
   } else if (currState == "deleted") {
     saveData("deleteData");
   }
}
As in the code above, it is modified to check if the current grid state is DELETED and call deleteData.
Likewise, add it to sample.xml, DAO, and Service in the mapper.
<delete id="deleteData" parameterType="String" >
       DELETE sample
       WHERE code = #{code}
   </delete>
RealGridDemoDAO.java
public interface RealGridDemoDAO {
public List<RealGridDemoVO> getDatas();
public int addData(RealGridDemoVO realGridDemoVO);
public int updateData(RealGridDemoVO realGridDemoVO);
public int deleteData(String code);
}
RealGridDemoService.java
@Service
public class RealGridDemoService {
@Autowired
RealGridDemoDAO realGridDemoDAO;

public List<RealGridDemoVO> getDatas() {
return realGridDemoDAO.getDatas();
}

public int addData(RealGridDemoVO realGridDemoVO) {
return realGridDemoDAO.addData(realGridDemoVO);
}

public int updateData(RealGridDemoVO realGridDemoVO) {
return realGridDemoDAO.updateData(realGridDemoVO);
}

public int deleteData(String code) {
return realGridDemoDAO.deleteData(code);
}
}
After viewing the data, press CTRL+DEL to change it to deletion status and check how the statusBar area has changed.
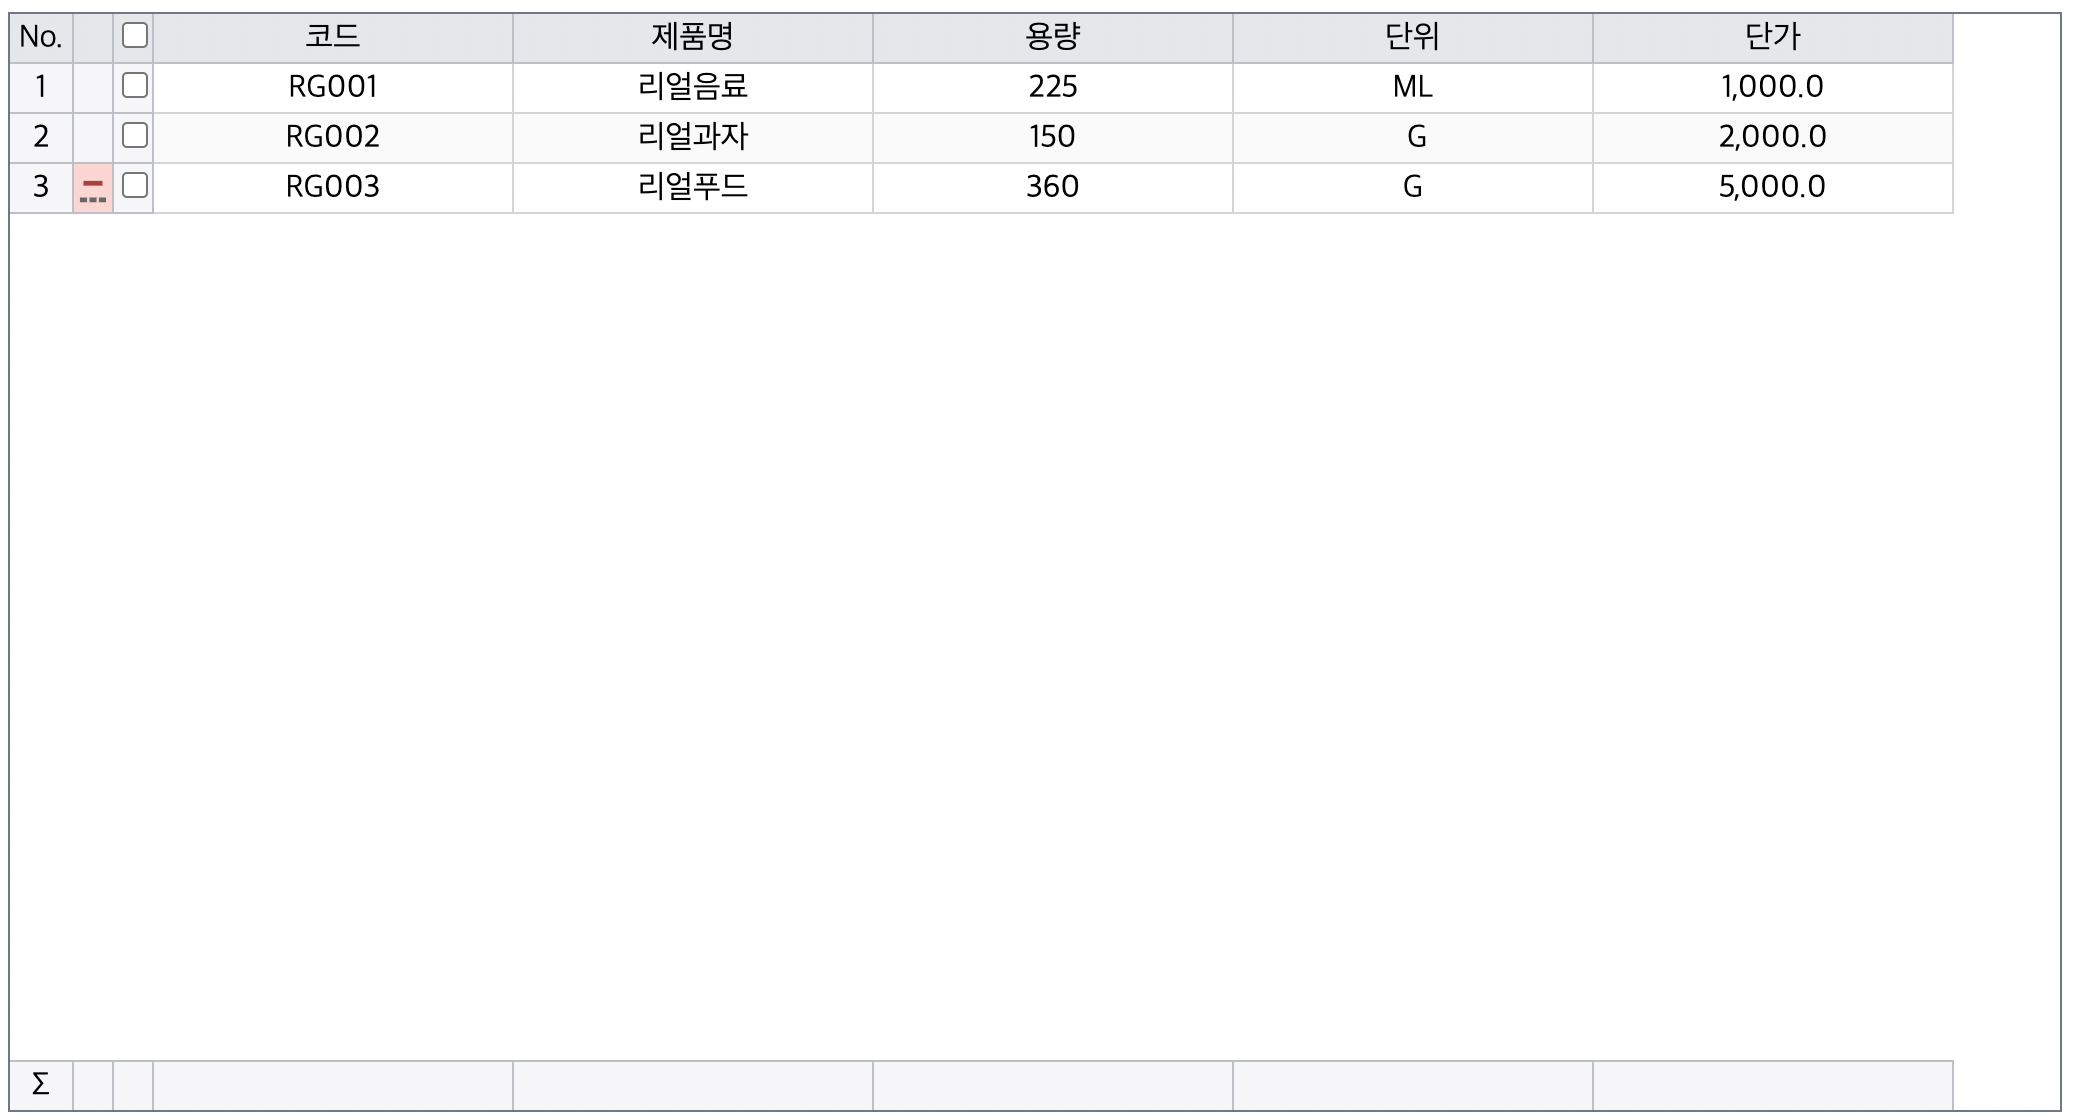
Even though you pressed the save button to delete it, it was deleted from the DB, but you can see that the data remains in the grid. In this case, you can solve it by setting dataProvider.clearRowStates(true).
function saveData(urlStr) {
var jRowData = dataProvider.getJsonRow(gridView.getCurrent().dataRow);
$.post(urlStr, jRowData, function (data) {
if (data > 0) {
alert("Save successful");
dataProvider.clearRowStates(true);
} else {
alert("Save failed!");
}
});
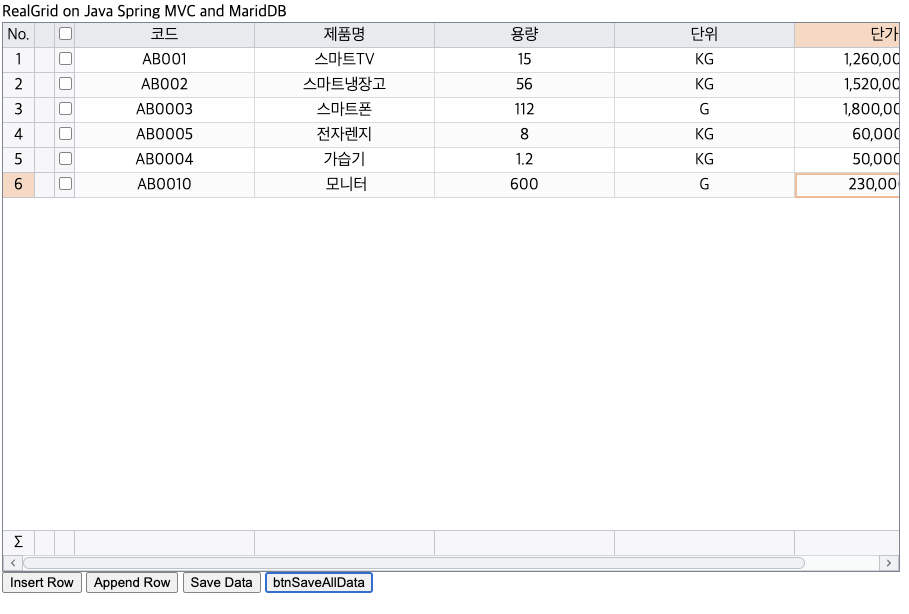
}Save All Data
All of the work so far has been row-by-row. When processing work, there may be cases where batch work is needed rather than row-by-row work.
From now on, we will use RealGrid to process INSERT, UPDATE, and DELETE in batches.
Add the btnSaveAllData button to home.jsp and write the corresponding method.
<button onClick="btnSaveAllData()">btnSaveAllData</button>function btnSaveAllData(e) {
gridView.commit();
saveDataAll("saveAllData");
}
function savedataAll() {
var state;
var jData;
var jRowsData = [];
var rows = dataProvider.getAllStateRows();
if (rows.updated.length > 0) {
$.each(rows.updated, function (k, v) {
jData = dataProvider.getJsonRow(v);
jData.state = "updated";
jRowsData.push(jData);
});
}
if (rows.deleted.length > 0) {
$.each(rows.deleted, function (k, v) {
jData = dataProvider.getJsonRow(v);
jData.state = "deleted";
jRowsData.push(jData);
});
}
if (rows.created.length > 0) {
$.each(rows.created, function (k, v) {
jData = dataProvider.getJsonRow(v);
jData.state = "created";
jRowsData.push(jData);
});
}
if (jRowsData.length == 0) {
dataProvider.clearRowStates(true);
return;
}
}Loop through the data received as a JSON Array to check the RowState and process it according to the action. When using the dataProvider.getAllStateRows() function, the state is a row number other than none.
{
updated: Array[0],
deleted: Array[0],
created: Array[0],
createAndDeleted: Array[0]
}
You can import it in this format.
To receive multiple data, you must receive it as a bean in List format, but in Spring 3.9, you cannot receive it as a List with @ModelAttribute or @RequestBody. Upgrade Spring to 4.0 or use the JSON.stringify function to request a JsonArray of String type to the server.
This example was implemented in Spring 3.9.
First, add a variable to receive the newly added state to the Product bean.
public class RealGridDemoVO {

private String code;
private String product_name;
private String volume;
private String unit;
private int price;
private String state;

public String getCode() {
return code;
}
public String getState() {
return state;
}
public void setState(String state) {
this.state = state;
}
public void setCode(String code) {
this.code = code;
}
public String getProduct_name() {
return product_name;
}
public void setProduct_name(String product_name) {
this.product_name = product_name;
}
public String getVolume() {
return volume;
}
public void setVolume(String volume) {
this.volume = volume;
}
public String getUnit() {
return unit;
}
public void setUnit(String unit) {
this.unit = unit;
}
public int getPrice() {
return price;
}
public void setPrice(int price) {
this.price = price;
}
}
Create Controller, Service, and DAO.
Controller.java
@RequestMapping(value = "saveAllData", method = RequestMethod.POST)
public @ResponseBody int saveAllData(@RequestBody String sampleStringList) {
List<RealGridDemoVO> sampleList = new ArrayList<RealGridDemoVO>();
JSONArray sampleJson = JSONArray.fromObject(JSONSerializer.toJSON(sampleStringList));
for (int i = 0; i < sampleJson.size(); i++) {
RealGridDemoVO sample = (RealGridDemoVO) JSONObject.toBean(sampleJson.getJSONObject(i), RealGridDemoVO.class);
sampleList.add(sample);
}
return realGridDemoService.saveAllData(sampleList);
}
RealGridDemoService.java
@Service
public class RealGridDemoService {
@Autowired
RealGridDemoDAO realGridDemoDAO;

public List<RealGridDemoVO> getDatas() {
return realGridDemoDAO.getDatas();
}

public int addData(RealGridDemoVO realGridDemoVO) {
return realGridDemoDAO.addData(realGridDemoVO);
}

public int updateData(RealGridDemoVO realGridDemoVO) {
return realGridDemoDAO.updateData(realGridDemoVO);
}

public int deleteData(String code) {
return realGridDemoDAO.deleteData(code);
}
@Transactional
public int saveAllData(List<RealGridDemoVO> realGridDemoVO) {

         int num = 0;

         for(RealGridDemoVO sampleVO1 :realGridDemoVO){
             if(sampleVO1.getState().equals("created"))
                 num += realGridDemoDAO.addData(sampleVO1);
             else if(sampleVO1.getState().equals("updated"))
                 num += realGridDemoDAO.updateData(sampleVO1);
             else if(sampleVO1.getState().equals("deleted"))
                 num += realGridDemoDAO.deleteData(sampleVO1.getCode());
         }
         return number;
}
}
Add the @Transactional annotation to enable rollback in case of a data storage error.
RealGridDemoDAO.java
public interface RealGridDemoDAO {
public List<RealGridDemoVO> getDatas();
public int addData(RealGridDemoVO realGridDemoVO);
public int updateData(RealGridDemoVO realGridDemoVO);
public int deleteData(String code);
public int saveAllData(List<RealGridDemoVO> realGridDemoVO);
}
After testing, you can confirm that the change was successful.
Commit By Cell
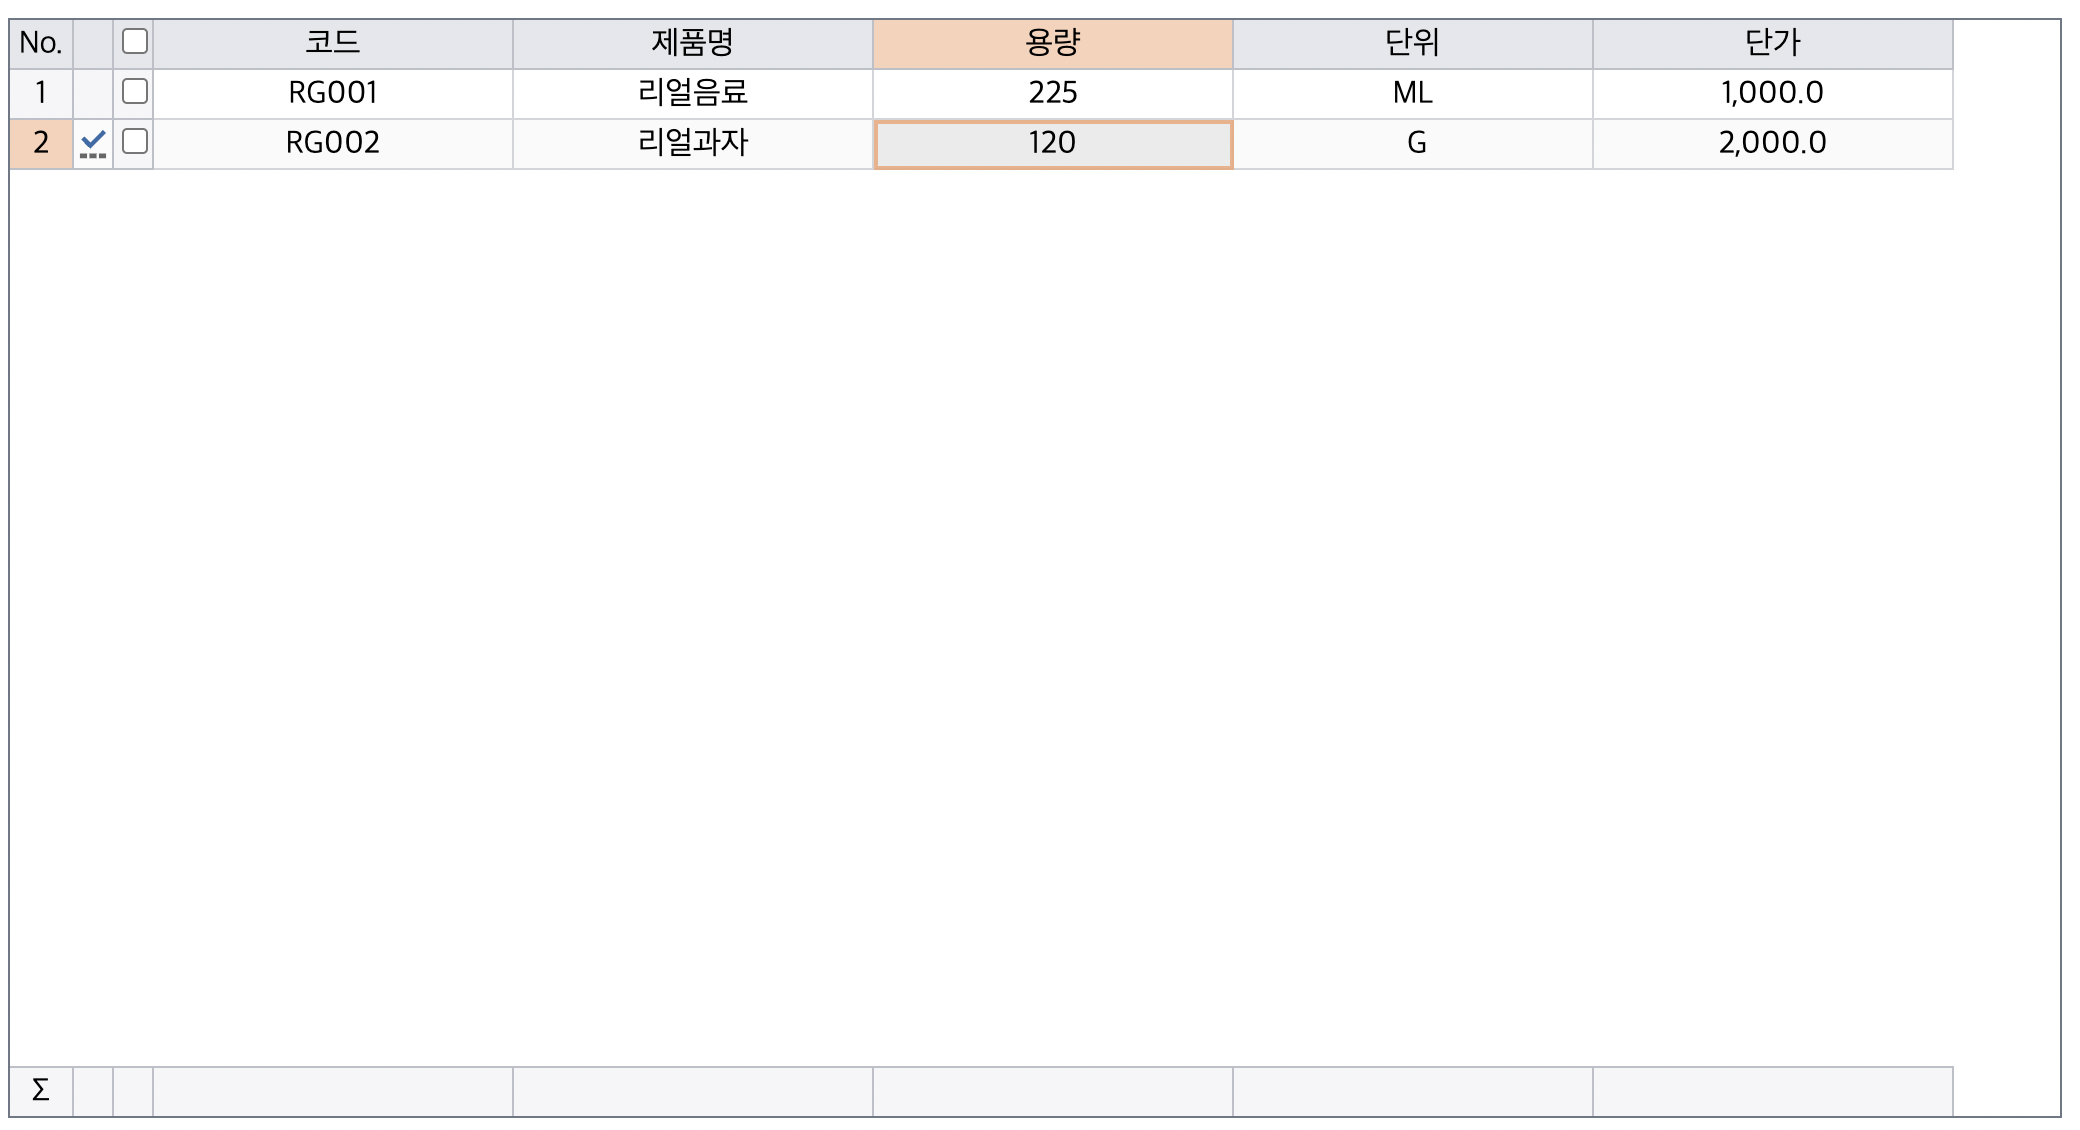
Let’s take a look at some additional features. After modifying the data in the grid, the status value of that row was changed to UPDATED only when the focus position of the grid was moved to another row. Let's set an option that allows you to specify commit on a cell-by-cell basis, allowing you to commit when you press the ENTER key after editing or move to another column without editing and moving to another row.
function setOptions(grid) {
   grid.setOptions({
     edit: {
       commitByCell: true;
       // Whether to commit after cell-level modification
       insertable: true;
       appendable: true,
       deletable: true,
       deleteRowsConfirm: true;
       deleteRowsMessage: "Are you sure?",
     },
   });
   dataProvider.setOptions({
     softDeleting: true;
   });
}
commitByCell = false
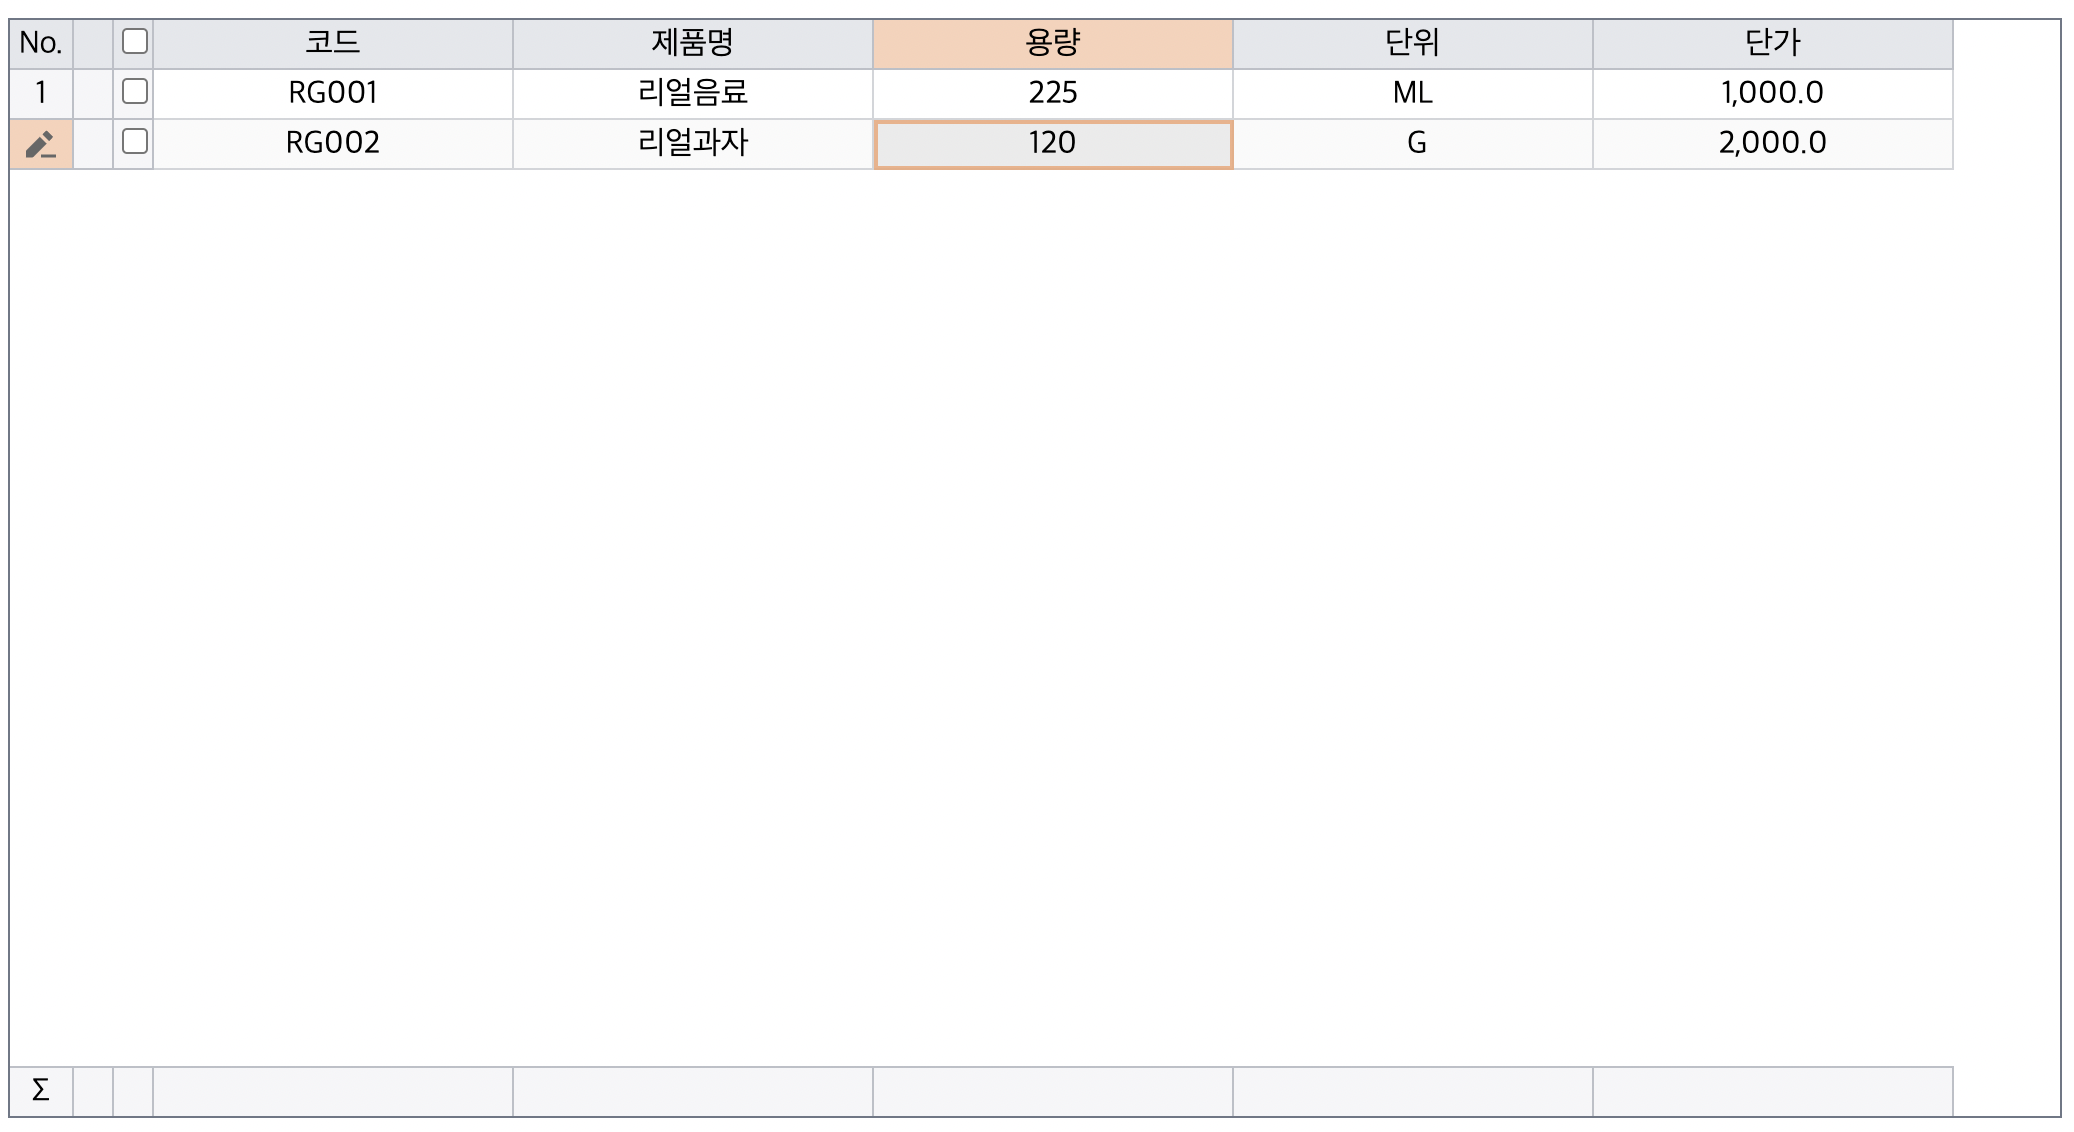
This is what it looks like when the editor closes after editing. You can see that the status bar is in the editing state.
commitByCell = true
When the editor is closed after modification, you can see that the status bar has changed to UPDATED.
GridView and DataProvider
So far, we have added rows using gridView.beginInsertRow() and gridView.beginAppend(). There are several ways to add rows in addition to the two methods above.
Before adding rows, you must know the difference between dataProvider and gridView. In RealGrid, the dataProvider has a separate dataset for effective data management, and the gridView has the data displayed on the screen.
For example, using the sort function in a grid changes the order of data displayed in the grid. At that time, the data order of the dataProvider is not changed, and the data order of the gridView is changed.
Please refer to the link below for further details.
http://help.realgrid.com/tutorial/a10/ (opens in a new tab)
http://help.realgrid.com/tutorial/a11/ (opens in a new tab)
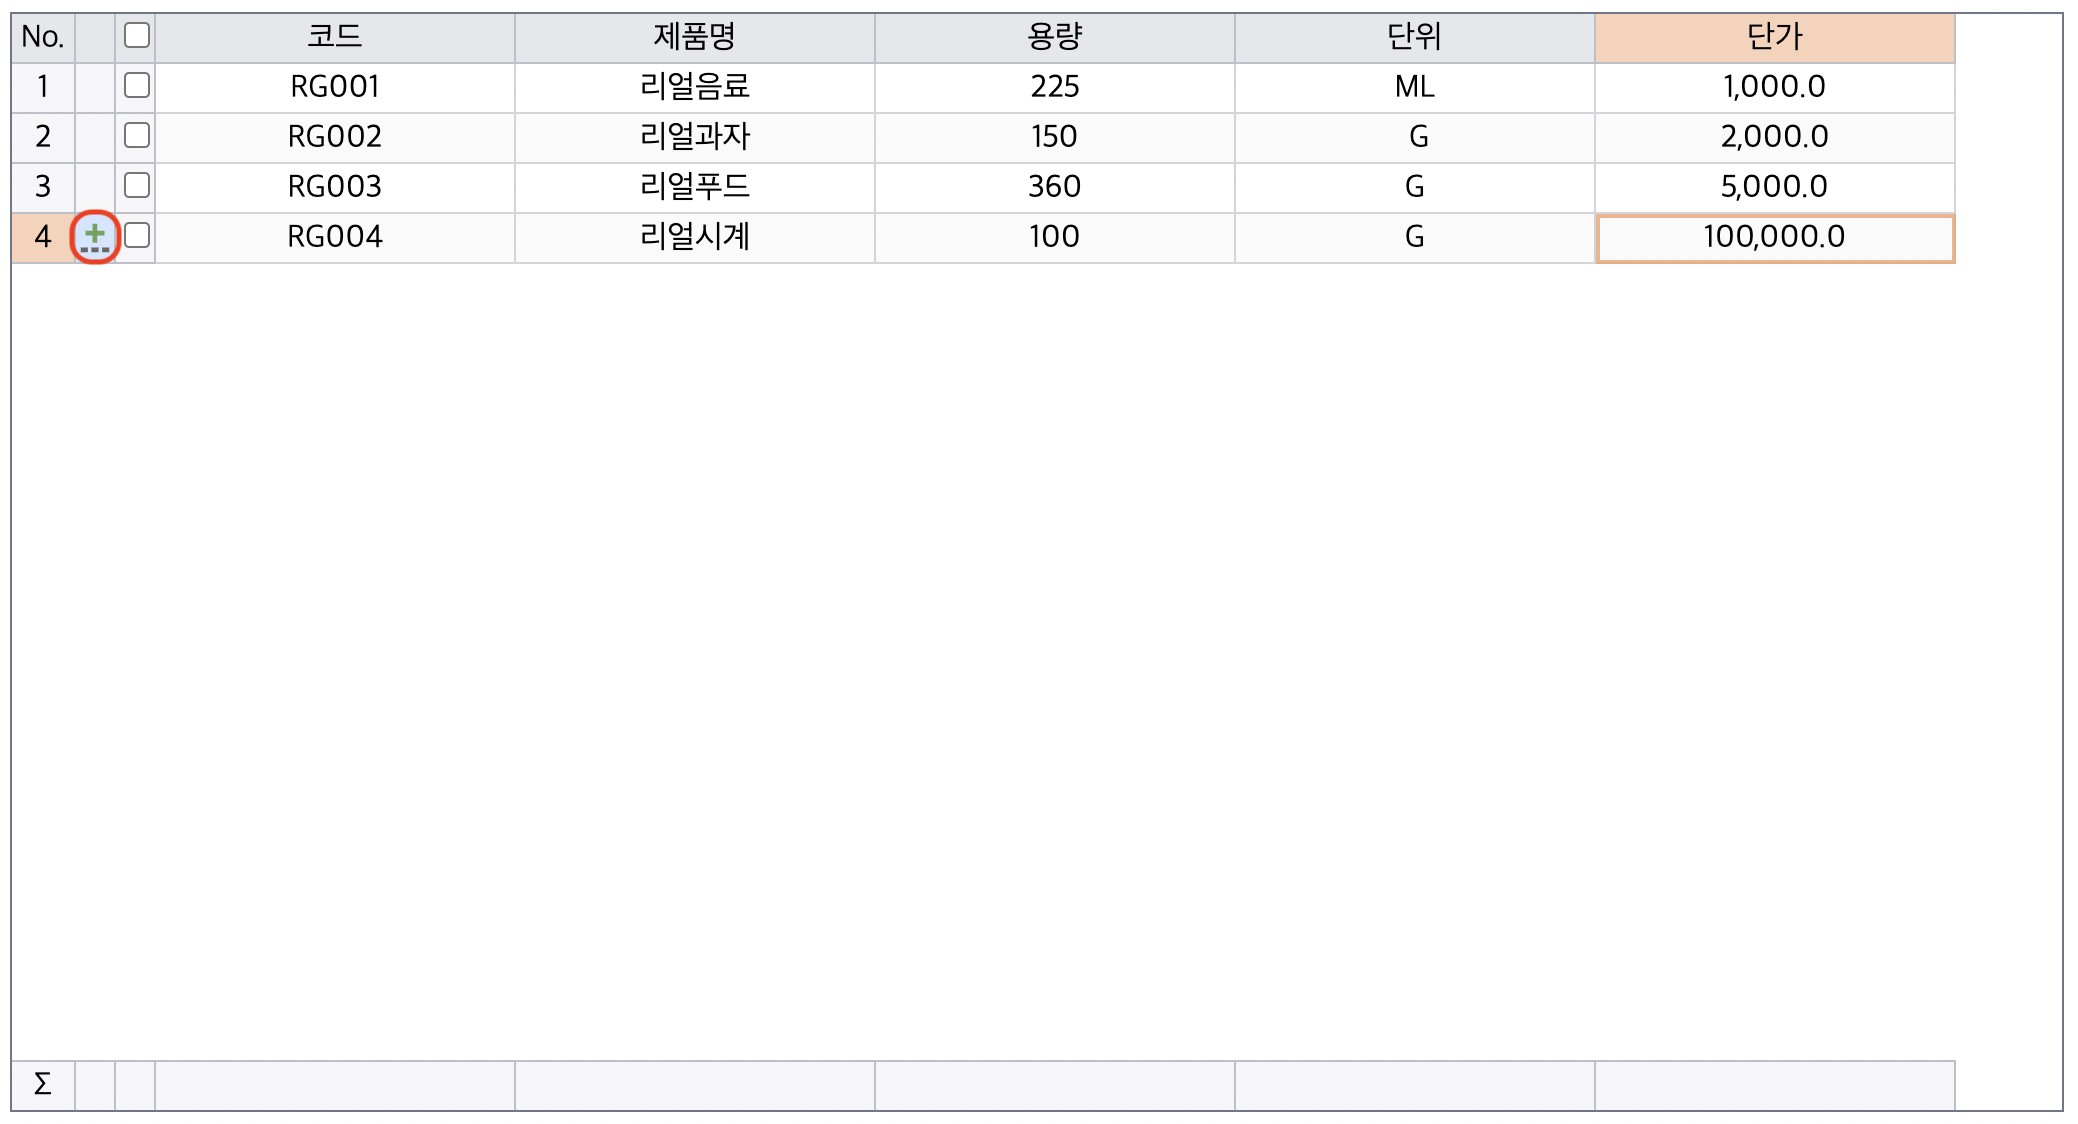
DataProvider insertRow, addRow
Let’s create one by adding two more buttons to home.jsp.
<button onClick="btnProviderInsert()">insertRow in provider</button>
<button onClick="btnProviderAdd()">addRow of provider</button>
And let's add a click event as well.
function btnProviderInsert() {
var tot = dataProvider.getRowCount();
var lastValue = dataProvider.getValue(tot - 1, 0);
var newValue = Number(lastValue.substr(-3)) + 1 + "";
dataProvider.insertRow(tot, {
code: "RG" + newValue.padStart(3, "0"),
});
}
function btnProviderAdd() {
var tot = dataProvider.getRowCount();
var lastValue = dataProvider.getValue(tot - 1, 0);
var newValue = Number(lastValue.substr(-3)) + 1 + "";
dataProvider.addRow({
code: "RG" + newValue.padStart(3, "0"),
});
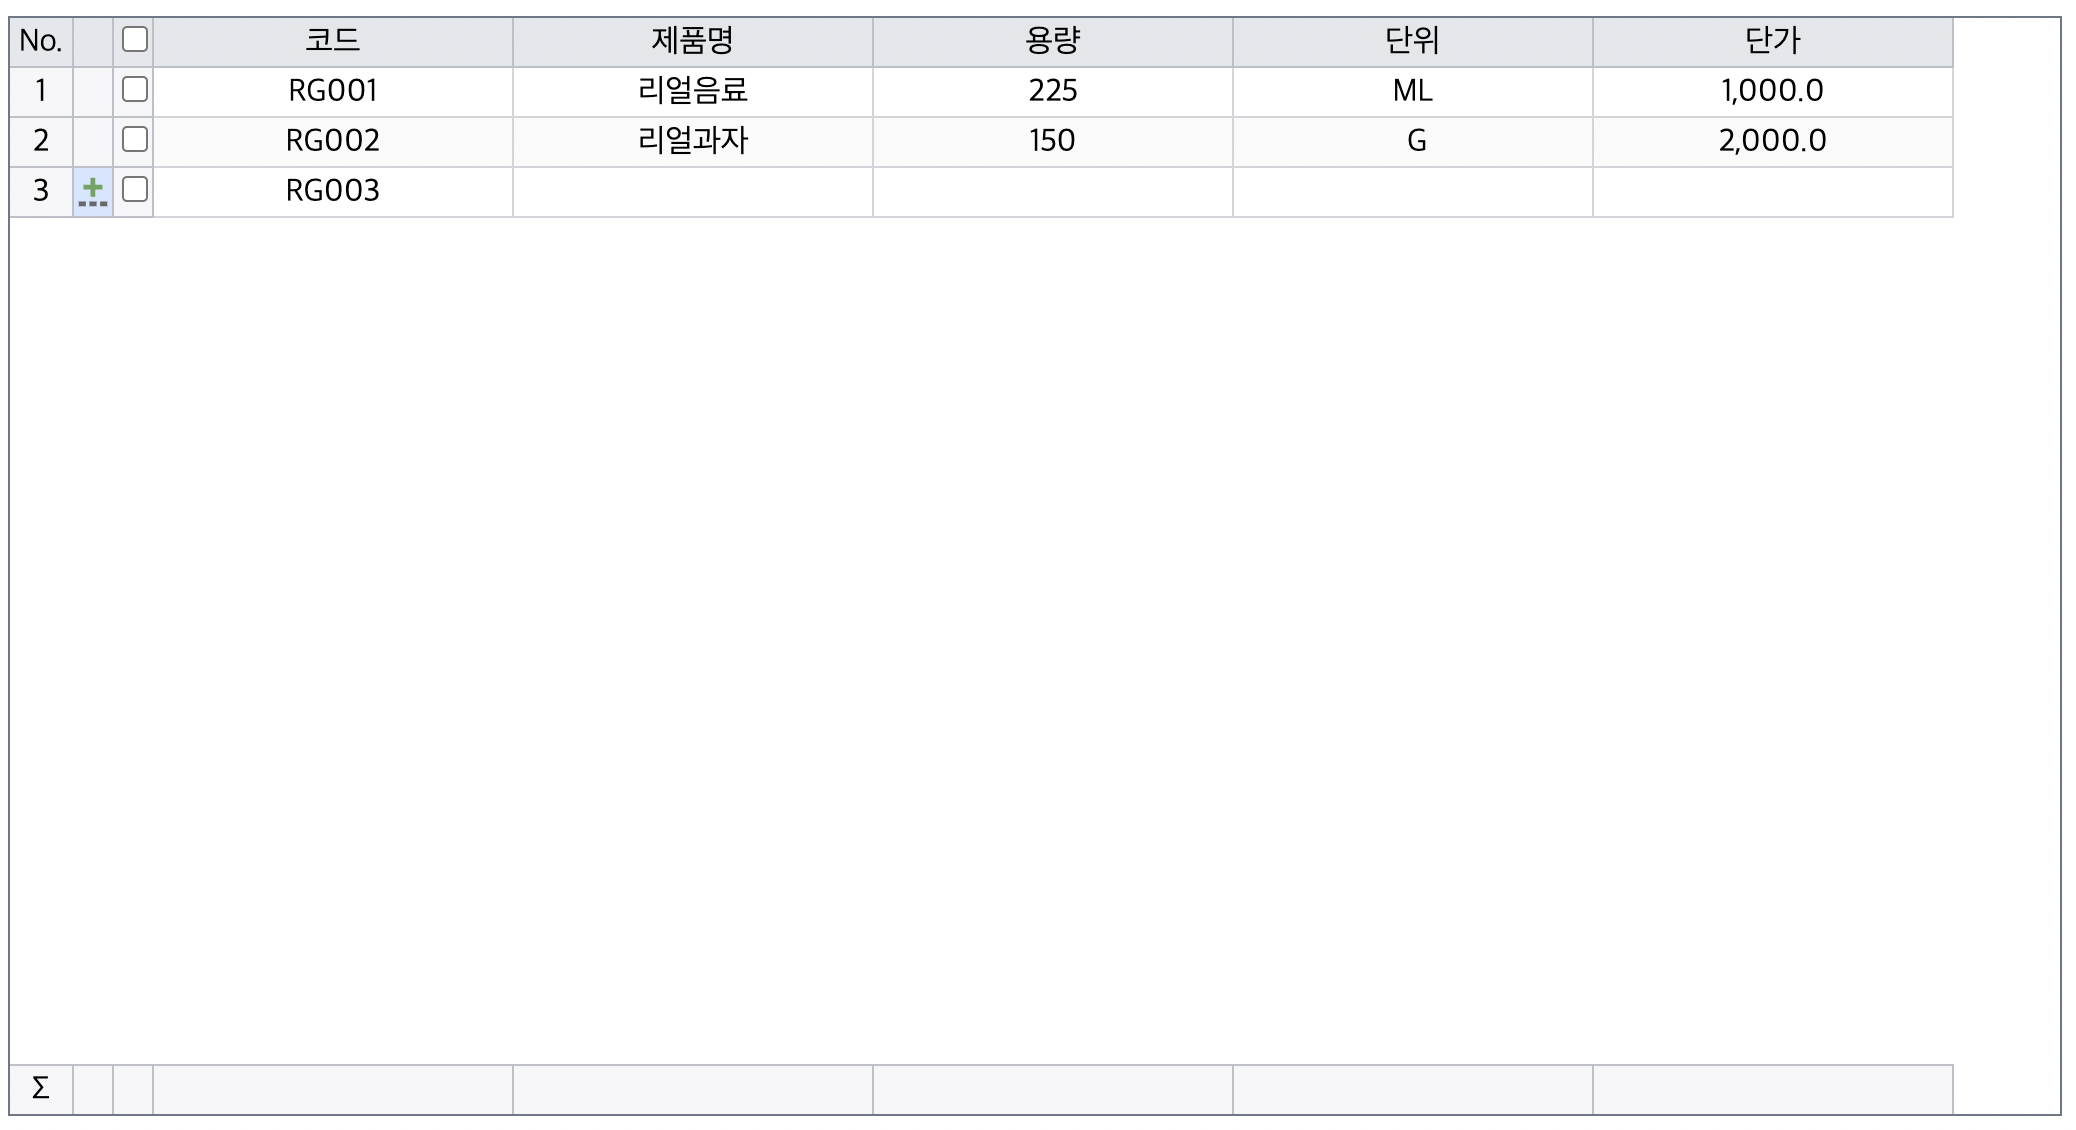
}Unlike gridView's beginInsertRow and beginAppendRow, dataProvider's insertRow and addRow can be set to default values as parameters.
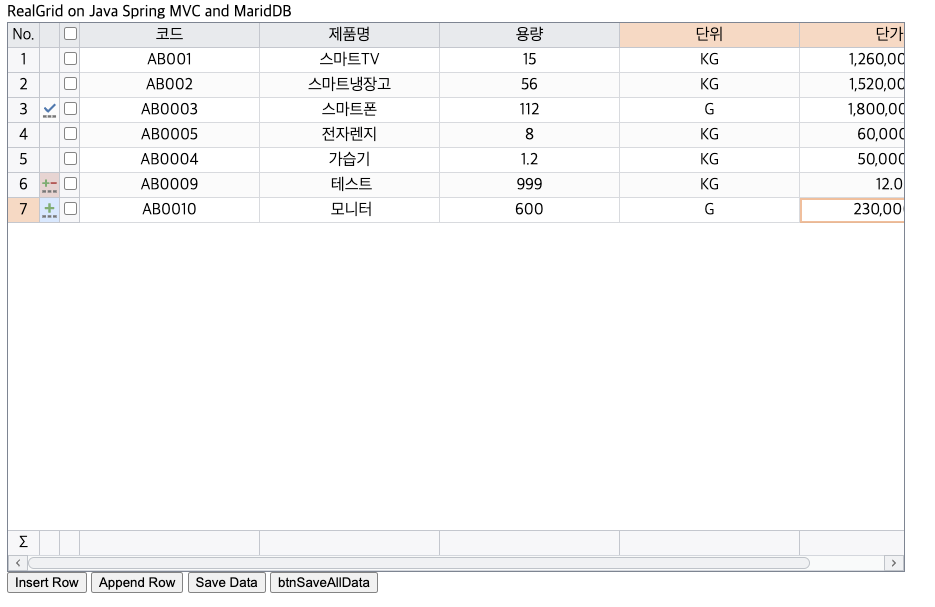
In addition, when the data provider's row addition is executed, you can see that the status value of the status bar changes to CREATED rather than the edit state, unlike adding the gridView's row.
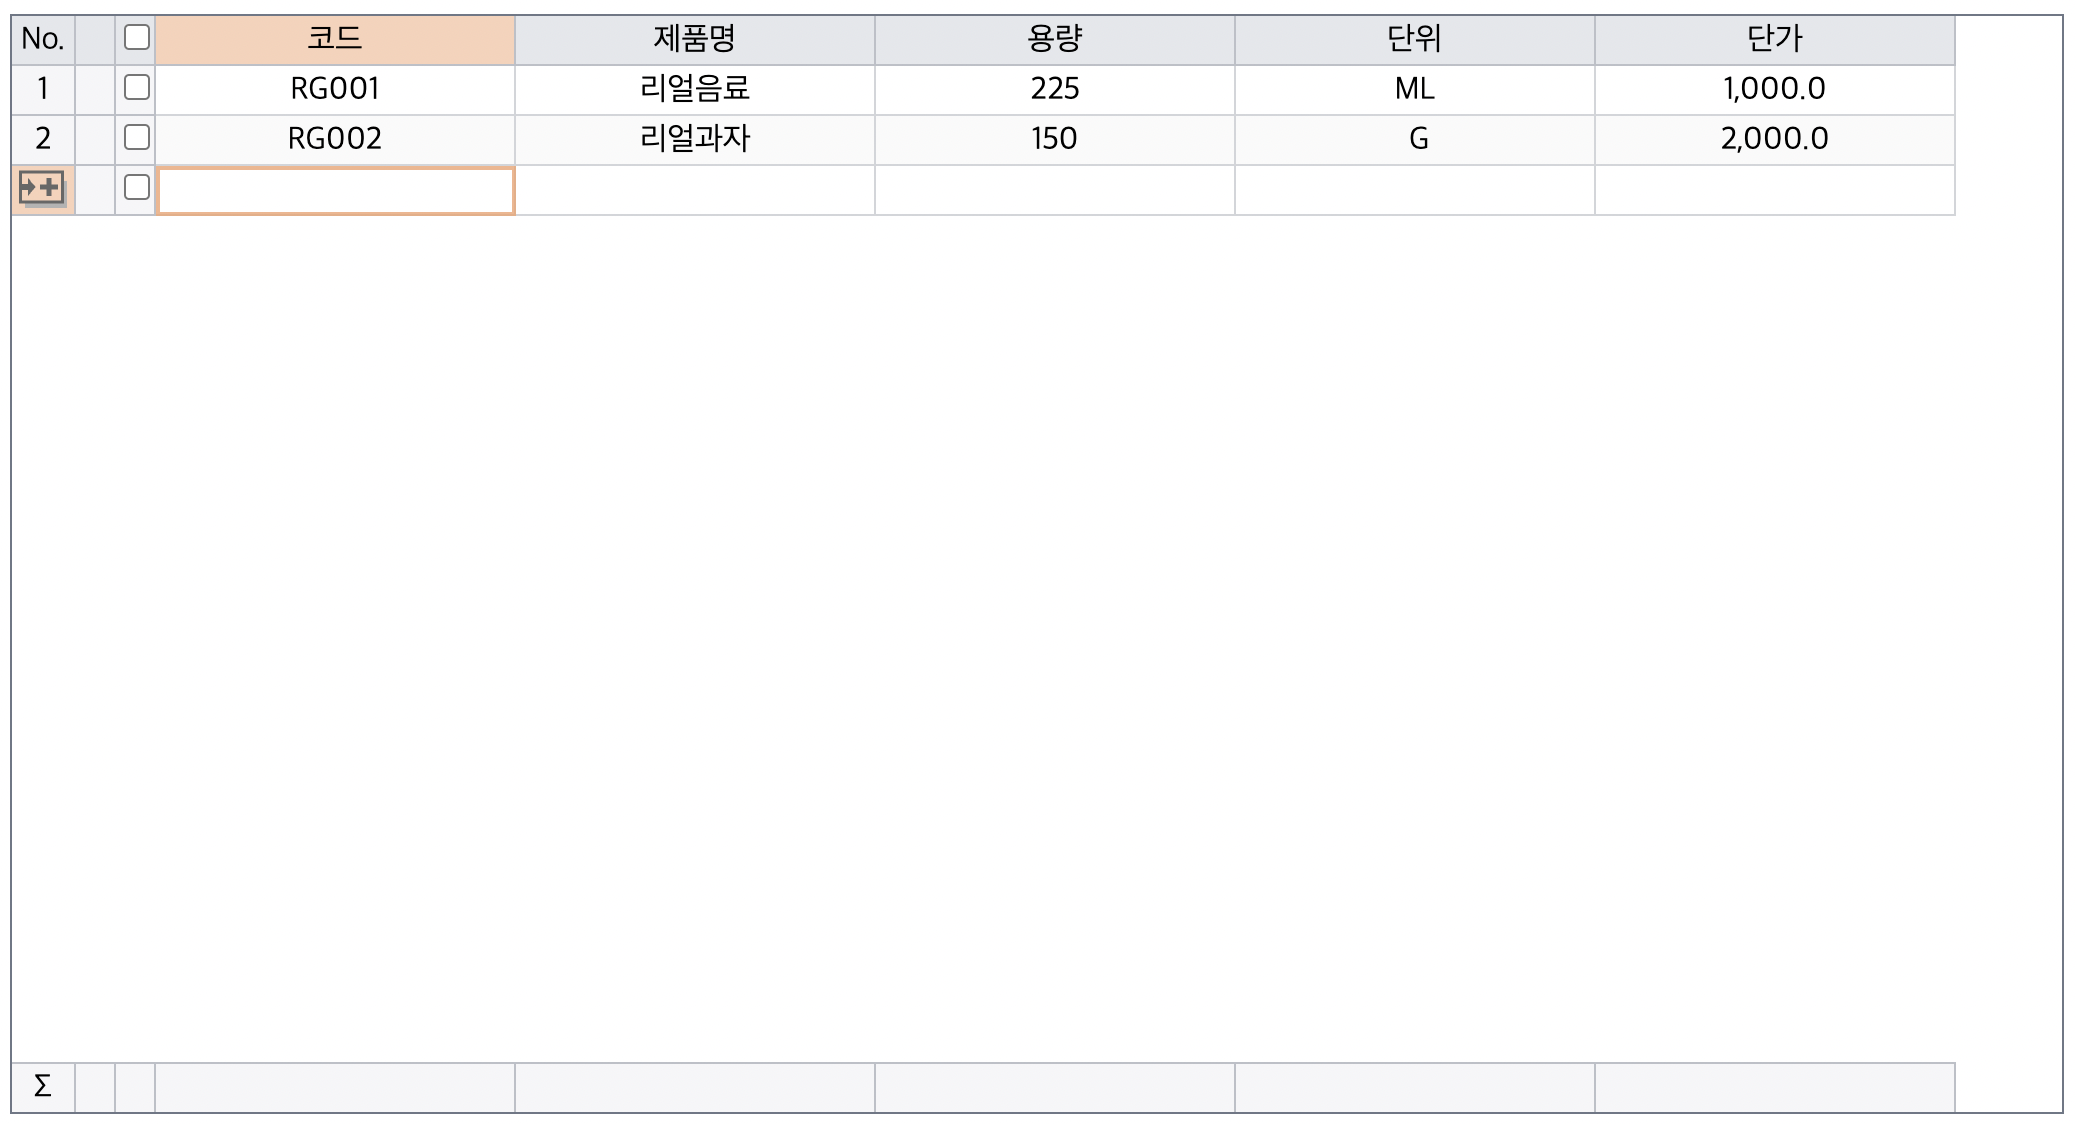
Add row in gridView
Add rows from dataProvider
Lastly, let's set the default to disable modification of the code column, which is a column set as a primary key in the DB, and change it so that modification is possible only when a new row is added.
Let's add the non-editable option to the code column as the default.
{
   fieldName: "code",
   width : 180,
   header : {
     text: "code"
   },
   editable : false,
},
Because only the dynamically CREATED state must be modified, a styleCallback callback function is created.
{
   fieldName: "code",
   width : 180,
   header : {
     text: "code"
   },
   editable : false,
   styleCallback: function(grid, model){
     if(model.item.rowState == "created"){
       return {
         editable: true
       }
     }
   }
},
If you write the above code, you can see that only the code column of the row added as a new row, that is, the status is CREATED, can be modified, and existing code columns cannot be modified.
Source code download